Category: How To

Loading RDS Applications on Tera2 Zero Client 0

Loading RDS Applications on Tera2 Zero Client

Firmware 4.8 is released by Teradici for Tera2 Zero clients and new firmware has new feature for RDS applications. Users be able to load RDS applications on zero client and there is no need to load any OS. This feature very useful for using the devices in some public locations such as libraries, for example you can install your book finder application on a RDS server and add it to your connection server, then your subscribers can access to this app without loading that via any OS. You can download the firmware via Teradici support site. But as I mentioned before, this firmware is released for Tera2 generation.

Reverting to a previous version of ESXi 0

Reverting to a previous version of ESXi

When you have updated your ESXi to newer version or patch it but you have some problems with new ESXi, you can revert to previous version easily: Note: Back up your configuration data before making any changes. Further Reading VMware Horizon View Connection (Session) Duration Report vSphere 7 Upgrade Series – Part 2: Hardware Compatibility vSphere 7 Upgrade Series – Part 1: Define Upgrade Path

VMware View Agent Disabled 0

VMware View Agent Disabled

When you have cloned a virtual machine from another and customization is failed or machine ID is not changed during customization, both virtual machines trying to communicate with connection server and you face with “Agent Disabled” status on View manager portal because View server ignores conflict messages. You need to remove the below key from the registry after removing View Agent: HKEY_LOCAL_MACHINE\SOFTWARE\VMware, Inc.\VMware VDM\ Then reinstall View Agent on the machine. [quotes_and_tips]  

Reset your Windows Sever 2008 / R2 Domain Controller administrator password 0

Reset your Windows Sever 2008 / R2 Domain Controller administrator password

It’s possible to reset your Windows Sever 2008 / R2 Domain Controller administrator password using your installation CD. Restart your Windows server 2008 DC with the installation CD Choose your language and click next Select your partition and installation version and click Next Click on Command Line Prompt Change directory to the access the system 32 directory. Then your original C:drive is changed to D: or E: depending on the number of drive and partitions you have on that system. Rename the file Utilman.exe to Utilman.exe.bak using the comm and Copy Utilman.exe Utilman.exe.bak.   Using Command Move Cmd.exe Utilman.exe to move CMD.exe file into Utilman.exe. Press O or Y to accept after that restart your Computer normaly   At the user logon screen, press a combination of Windows KEY+U, then the CMD.exe will appear. Type net user “Username””new password”;   Then your system Admin Password is reset. Please don’t forget to rename back Utilman. Exe ->Cmd.exe and Utilman.exe.bak-> Utilman.exe after getting back access.

Add domain user to administrators group on remote machine (VBScript) 2

Add domain user to administrators group on remote machine (VBScript)

We have a support team that they need to our assistance about adding their accounts to local administrators group of some computers. My colleagues have to open “Computer Management”, connect to remote computer and add the user to the group. I don’t like this process. The below script helps my colleagues, maybe useful for you as well: Further Reading Run ESXi Commands Via PowerShell And SSH Windows 7 USB Sound Problem On PCoIP How to change the listening port for Remote Desktop

Adding persistent route on Ubuntu 0

Adding persistent route on Ubuntu

I have to using VPN in my office for connecting to some services and add some routes to my Ubuntu routing table. But the routes will be removed after reboot. So I have to add them manually again. I googled that and find a solution for adding the routes when interface is coming up. You need to create a script under “/etc/network/if-up.d/”, for creating the script, follow the below steps: 1. Create script file by using “cat” command or other text editors: #cat > your-script-file #!/bin/bash route add -net x.x.x.x netmask x.x.x.x gw x.x.x.x route … route … CTRL+D (For saving file) Make the script file as an executable script file: #chmod +x your-script-file Then restart networking service or unplug and plug your network and run “route -n”. If the routes network are available, then the routes will be added to routing table. Note: You script should be saved without “.sh”. I tested it on Ubuntu 14.04. Run the below command for test: run-parts –test /etc/network/if-up.d

Windows Profile Cleanup Script 0

Windows Profile Cleanup Script

This script can help you to clean your users profiles without installing any third party application, you can put it as shutdown or startup script: If you want to run it as scheduled task, you need to run that via batch file with a local administrator account. This batch file create a local administrator account, run the previous script under the user’s privilege and then remove the user. The scripts tested under Windows XP and Windows 7. Further Reading Veeam Backup & Replication – Re-IP Rule on Linux VM Recommended Settings on Windows 10 for VDI

How to change the listening port for Remote Desktop 0

How to change the listening port for Remote Desktop

Start Registry Editor. Locate and then click the following registry subkey: HKEY_LOCAL_MACHINE\System\CurrentControlSet\Control\TerminalServer\WinStations\RDP-Tcp\PortNumber On the Edit menu, click Modify, and then click Decimal. Type the new port number, and then click OK. Quit Registry Editor. Restart the computer. Note When you try to connect to this computer by using the Remote Desktop connection, you must type the new port. Maybe you have to set the firewall to allow the new port number before you connect to this computer by using the Remote Desktop connection.

Reloading a vmx File Without Remove That From vCenter Inevntory 0

Reloading a vmx File Without Remove That From vCenter Inevntory

I’m working on a solution that it needs to edit something on virtual machine vmx file. But as you know, vmx file should be removed and re-add from vCenter inventory for apply new configurations. This process is very simple but you have to find your virtual machine datastore and remove the virtual machine from inventory and re-add that again. There is a way for reloading your vmx file without do the above process from ESX/ESXi command line (Tech Support Mode). To reload the virtual machine configuration .vmx file on an ESXi/ESX host from the command line: Log in to the Local Tech Support Mode console of the ESXi/ESX host. Obtain the Inventory ID (Vmid) for the virtual machine by running the command:# vim-cmd vmsvc/getallvmsThe output shows virtual machines which are registered on the ESXi/ESX host. Example output: Vmid   Name                          File                Guest OS                 Version     Annotation 2848   Win2003_storage_performance   [local] Win .vmx    winNetEnterpriseGuest    vmx-07      To be used as a template In this example, the Vmid is 2848. Reload the virtual machine configuration .vmx file...

Windows 8.1 Slow with USB 3.0 0

Windows 8.1 Slow with USB 3.0

Finally, Windows 8.1 preview is released on last month and we can test it in our virtual platforms. I want to deploy Windows 8.1 for our Call Center users because Windows 8 has lower IOPS compare to Windows 7. Also it has very faster start-up compare to earlier versions. I had poor performance with USB controller on this version of Windows. xHCI controller (USB 3.0) is default controller for Windows 8. I found solution on VMware KB2057809 and if you are facing with same issue, You should remove current controller and replace it with  EHCI+UHCI controller.

3 0

View Agent 5.1: Best Solution to Install Silently

I had a big problem on last week for upgrade my clients View Agent from 5.0 to 5.1. We are using Windows XP 64-bit form 2 years ago for our Call Center’s clients and I have a plan for upgrade my View servers from 5.1 to 5.2, so I have to upgrade View agents t0 5.1 for compatibility with View 5.2 at least. As you may know, this OS is not supporting by View agent officially but View agent 4.6, 5.0 and 5.1 can working on that properly. I had upgrade from 4.6 to 5.0 before but I faced with some issues in test step and wrote a script for upgrade agents completely silent. First Step, Prepare Client for View Agent Installation First, I want to mention that if you have plan for deploy the agent by SCCM, you should forget that, because it’s impossible. Anyway, you have 3 issues that you should resolve them to do silent installation: First step, copy your installation data and scripts to a shared folder with everyone access. Second step, if you have very secure environment like me that administrative share is disabled on that by your security manager, you have to enable it via registry....

update vmtools automatically 1

Update VMware Tools Automatically

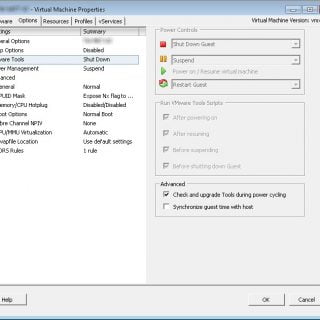
Oh, VMware released a critical patch or new vSphere version, you need to upgrade your environment. Your environment is upgraded but VMware recommended that keep VMware Tools updated on your virtual machines, so you have to update. How do you update VMware tools? Using vSphere client, PowerCLI or … . Best way is enable a settings in virtual machine settings, “Check and upgrade Tools during power cycling”. But you need to check it on every VM. You can use this script for enable that on all Windows virtual machines in vCenter.

DCUI 2 0

Accessing Direct Console User Interface (DCUI) from an SSH session

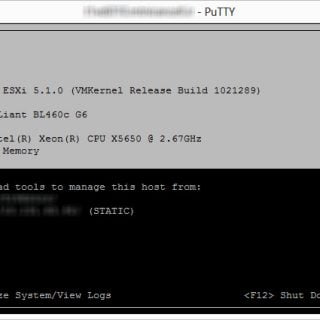
I read a VMware article (2039638) about Accessing Direct Console User Interface (DCUI) today. I’m surprised about that becuase, I didn’t know any thing about accessing to that from SSH. I tested that and found it very useful, if you can’t access to your KVM, it can help you to access to DCUI and do your settings easily. Just you should run your SSH client and enter “dcui” on command line. Press CTRL+C to close that. You can use it on slow networks or from your home or in travel by using VPN.

VMware View indicates a ThinApp package application is invalid 0

VMware View indicates a ThinApp package application is invalid

Streaming Application You may get this error when trying to scan a streaming application and the View Connection Server logs may report these errors: 12:35:31,020 ERROR <MessageFrameWorkDispatch> [ws_thinappmgmt] OpenPackage failed, path = \\thinappserver\ThinAppStore\WinSCP\WinSCP.msi. Error details. HRESULT hr = 0x8c420002. Internal error: unable to create API object 12:35:31,022 INFO <TP-Processor1> [ThinAppMSIManager] Application MSI with path:\\thinappserver\ThinAppStore\WinSCP\WinSCP.msi skipped. Reason:Error details. HRESULT hr = 0x8c420002. Internal error: unable to create API object   This issue occurs if all package components are not available during the scanning.   To resolve this issue, confirm that in addition to the application’s .msi file, the directory where the .msi file is located contains all associated .exe and .dat files that were created during the build process. A streaming application has an .msi and an .exe file. If the .exe file is not present the application was not captured with streaming activated, rebuild the application with the MSIStreaming paramater’s value set to 1 in the package.ini file located at the project directory when the package is built. Full Assignment Application If this is Full Assignment application and all the files from the package is in the thinapp repository folder and the logs on the View Connection Server is showing...

Desktop Search – Event 3083 window search Mapi2Handler.1 cannot be loaded 0

Desktop Search – Event 3083 window search Mapi2Handler.1 cannot be loaded

Problem ========= Windows 2003/Event 3083 window search Mapi2Handler.1 cannot be loaded EventID:3083 Category: Gatherer Description:The protocol handler Search.Mapi2Handler.1 cannot be loaded. Error description: Class not registered Desktop Search Version 4 Analyze ======== The background on this issue is that there are two processes that can index on 64-bit machines. One process is 64-bit and can load 64-bit protocol handlers and the other is a 32-bit process, which can load 32-bit protocol handlers. In this case, since mapi (which is used to index outlook email) is 32-bit only when the 64-bit protocol handler process starts it tries to load the 64-bit version of the non-existent mapi protocol handler. It should call into the WOW64-32 layer to determine that this handler is correctly registered in the other CLSID hive and not display the error. For some reason this check is not passing most likely due to some incompatible vista only flag we are using when calling to WOW64.32 bit applications use [HKEY_CLASSES_ROOT\Wow6432Node\CLSID64 bit applications use [HKEY_CLASSES_ROOT\CLSID Solution Remove Windows Desktop Search or add the following registry entry ===== Windows Registry Editor Version 5.00 [HKEY_CLASSES_ROOT\CLSID{9E175BAF-F52A-11D8-B9A5-505054503030}] @=”Windows Search Service Office Outlook Protocol Handler” [HKEY_CLASSES_ROOT\CLSID{9E175BAF-F52A-11D8-B9A5-505054503030}\InprocServer32] @=hex(2):25,00,73,00,79,00,73,00,74,00,65,00,6d,00,72,00,6f,00,6f,00,74,00,25,\ 00,5c,00,73,00,79,00,73,00,74,00,65,00,6d,00,33,00,32,00,5c,00,6d,00,73,00,\ 73,00,70,00,68,00,2e,00,64,00,6c,00,6c,00,00,00 “ThreadingModel”=”Both” [HKEY_CLASSES_ROOT\CLSID{9E175BAF-F52A-11D8-B9A5-505054503030}\ProgID] @=”Search.MAPI2Handler.1″ [HKEY_CLASSES_ROOT\CLSID{9E175BAF-F52A-11D8-B9A5-505054503030}\VersionIndependentProgID] @=”Search.MAPI2Handler” =====