Category: Data Center

WXP7Optimization 0

Windows XP/7 Optimization – Presentation

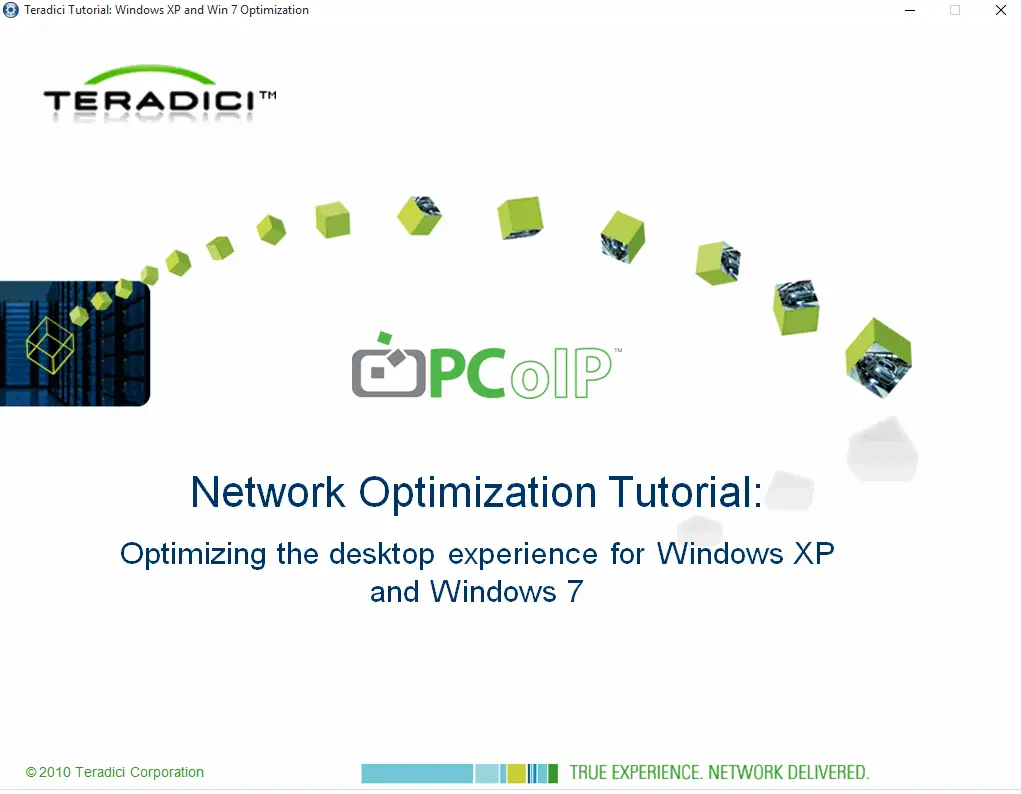
I want to introduce an old presentation that published by Teradici at 2010 but you don’t think that it has old information, you can see it and learn about Windows 7 optimization in VDI environment. Of curse, there is many optimization tools and documents such as VMware OS Optimization Tool but it’s useful yet. You can download it via this link: https://techsupport.teradici.com/ics/support/DLRedirect.asp?fileNum=143&deptID=15164 You need to create a Teradici account for download it.

rdy 01 0

Virtual Machine CPU RDY Alarm – PowerCLI Script

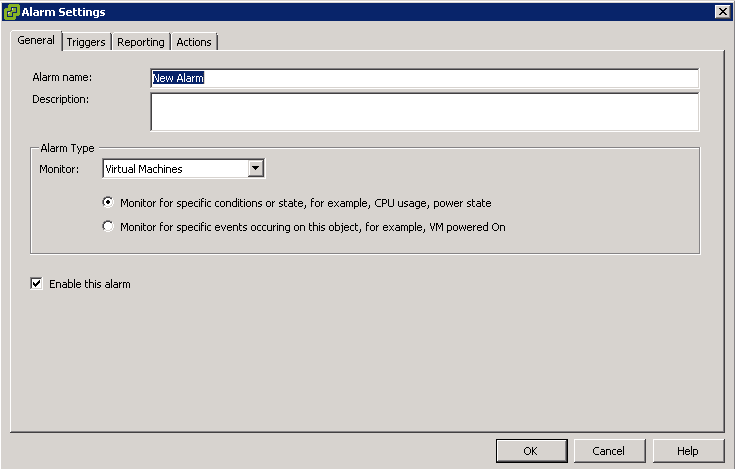
As I know and I have read it in many blogs that DRS is not sensitive to CPU ready time and when your cluster has enough CPU frequency and memory, cluster is balanced. There is a simple solution to resolve the issue or reduce the issue in your environment. Of course, this is not true solution and you need to analyze your platform, calculate your requirements especially CPU cores for your VMs and add more physical cores to by adding more physical servers. Create Alarm At first step, you need to define an alarm in your vCenter for virtual machine CPU ready: Create a user-defined alarm and enter a name as you wish. In Triggers tab, select “VM CPU Ready Time (ms) and define waning and error values and condition length. Default values are fine for most platforms. Just that, click on OK and our job is done. If you have virtual machines with high CPU ready, it will be detected by vCenter and alarm will be generated. Note: Please copy your alarm name and paste it in the below script. Also you can change exception time, if you need to run it after working hours. The Script Further Reading...

PCoIP Configurations – Client Side 1

PCoIP Configurations – Client Side

I have made a registry file based on PCoIP recommendation for apply on all virtual desktops in our company 2 years ago. The settings covers image quality, bandwidth, analog sound channel and USB permission. You can apply the below configuration on your template ad there is no need to apply configuration on Zero Clients: Windows Registry Editor Version 5.00 [HKEY_LOCAL_MACHINE\SOFTWARE\Policies\Teradici\PCoIP\pcoip_admin_defaults] “pcoip.transport_session_priority”=dword:00000001 “pcoip.server_clipboard_state”=dword:00000001 “pcoip.enable_build_to_lossless”=dword:00000000 “pcoip.max_link_rate”=dword:00015f90 “pcoip.mtu_size”=dword:00000514 “pcoip.device_bandwidth_floor”=dword:00002710 “pcoip.enable_audio”=dword:00000001 “pcoip.enable_micin_noise_filter”=dword:00000001 “pcoip.audio_bandwidth_limit”=dword:000001f4 “pcoip.usb_auth_table”=”23XXXXXX” “pcoip.usb_unauth_table”=”2208XXXX” “pcoip.minimum_image_quality”=dword:00000032 “pcoip.maximum_initial_image_quality”=dword:0000005a “pcoip.maximum_frame_rate”=dword:0000000f “pcoip.use_client_img_settings”=dword:00000001 “pcoip.image_cache_size_mb”=dword:0000012c You can change MTU size, sound bandwidth and bandwidth floor regarding to your network bandwidth. Our users are happy with the above configurations and I think, these settings are fine for any LAN environment. You can read VMware KB and VMware Network Optimization for more information and optimize your platform.   [quotes_and_tips]

VMXNET3 – Microsoft Hotfix 0

VMXNET3 – Microsoft Hotfix

Deploying Windows 2008 R2 and Windows 7 templates with vmxnet3 renames the NIC as #2 The above subject is VMware KB 1020078 and I think, you should apply this hotfixes on your templates when you have Windows 7 and Windows 2008. You can download the hotfixes from these links: For Windows 2008 R2 or Windows 7 versions prior to Service Pack 1, install the hotfix described in the Microsoft Knowledge Base article 2344941 before deploying the template. For Windows 2008 R2 or Windows 7 versions post Service Pack 1, install the hotfix described in the Microsoft Knowledge Base article2550978 before deploying the template Read the VMware KB for more information. [quotes_and_tips]

False Caution or Critical Temperature HP 0

False Caution or Critical Temperature On HP C-Class Enclosure

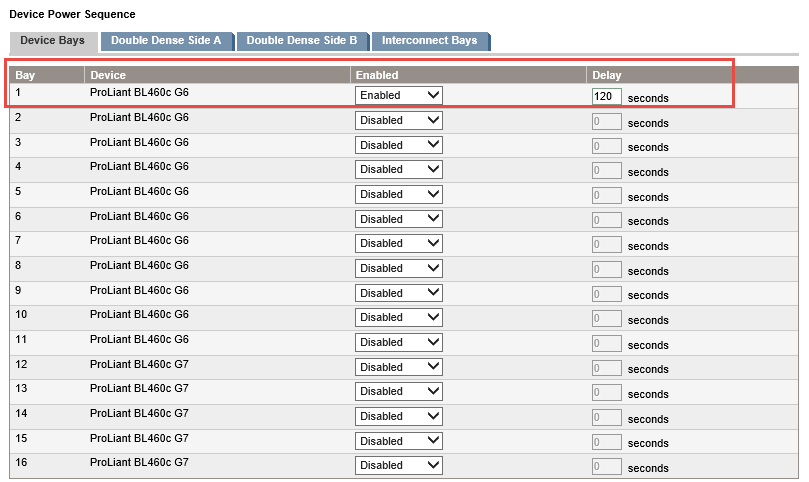
If you have C-Class enclosure in your environment and you have plan for upgrading OA firmware to 4.30 (or later) or you have installed OA module with 4.30 (or later) firmware, you need to configure delay time in “Device Power Sequence”. Seems, there is a problem during OA initializing process which OA shows incorrect “Caution” and/or “Critical” temperature. This is confirmed by HP officially and you can check this document for more information: c04655261 Anyway, you can configure the delay time via OA GUI same as the below:  

java net exception 1

Java.net.SocketException: No buffer space available – VMware View Connection Server

I had a problem on some of our View Connection servers, the servers consumed high CPU and memory and View Connection Server service had crashed after some hours. As I checked on View debug logs (VMware View log files location), the issue was related to Java and a bug on Windows 2008 R2/R2 SP1: I found a published Hotfix about the issue on Microsoft support site: Kernel sockets leak on a multiprocessor computer that is running Windows Server 2008 R2 or Windows 7 I suggest that install the hotfix on your current servers and new servers to preventing that on your server because if the server is a security server, your users’ connection will be disconnected.

Optimizing HP BIOS Settings For VMware vSphere 0

Optimizing HP BIOS Settings For VMware vSphere

Achieving best performance on ESXi by HP ProLiant servers needs to change some default configuration on HP RBSU (ROM-Based Setup Utility) or UEFI (Unified Extensible Firmware Interface). Some of the configurations have been mentioned on “Performance Best Practices for. VMware vSphere” but some them not mentioned. You can change the below configuration to achieve best performance on ESXi: Setting Default Recommended Reason No-Execute Page Protection (AMD)System Options -> Processor Options -> No-Execute Page Protection   No-Execute Memory Protection (Intel) System Options -> Processor Options -> No-Execute Memory Protection   Enabled Enabled It’s recommended by HP and the features protects systems against malicious code and viruses. Intel Virtualization TechnologySystem Options -> Processor Options -> Intel Virtualization Technology   AMD V (AMD Virtualization) System Options -> Processor Options -> AMD V (AMD Virtualization) Enabled Enabled When enabled, a hypervisor supporting this feature can use extra hardware capabilities provided by AMD/Intel. Intel Hyperthreading OptionsSystem Options -> Processor Options -> Intel Hyperthreading Options Enabled Enabled Intel Hyperthreading Options is a toggle setting that allows Intel Hyperthreading Technology to be enabled or disabled. Intel Hyperthreading delivers two logical processors that can execute multiple tasks simultaneously using the shared hardware resources of a single processor core. Enhanced...

HP ASR – Automatic Server Recovery 0

HP ASR – Automatic Server Recovery

How much do you know about HP ASR? How it works? The ASR feature is a hardware-based timer. If a true hardware failure occurs, the Health Monitor might not be called, but the server will be reset as if the power switch were pressed. The ProLiant ROM code may log an event to the IML when the server reboots. ASR Timeout The ASR Timeout option sets a timeout limit for resetting a server that is not responding. When the server has not responded in the selected amount of time, the server automatically resets. The available time increments are: 10 minutes 15 minutes 20 minutes 30 minutes 5 minutes This ASR feature is implemented using a “heartbeat ” timer that continually counts down. The Health Monitor frequently reloads the counter to prevent it from counting down to zero. If the ASR counts down to zero, it is assumed that the operating system has locked up and the system will automatically attempt to reboot. Events which may contribute to the operating system locking up include: A peripheral device − such as a Peripheral Component Interconnect Specification (PCI) adapter − that generates numerous spurious interrupts when it fails. A high priority software application...

VeeamBR BackupJob 1

Veeam Backup & Replication – Bottleneck Analysis

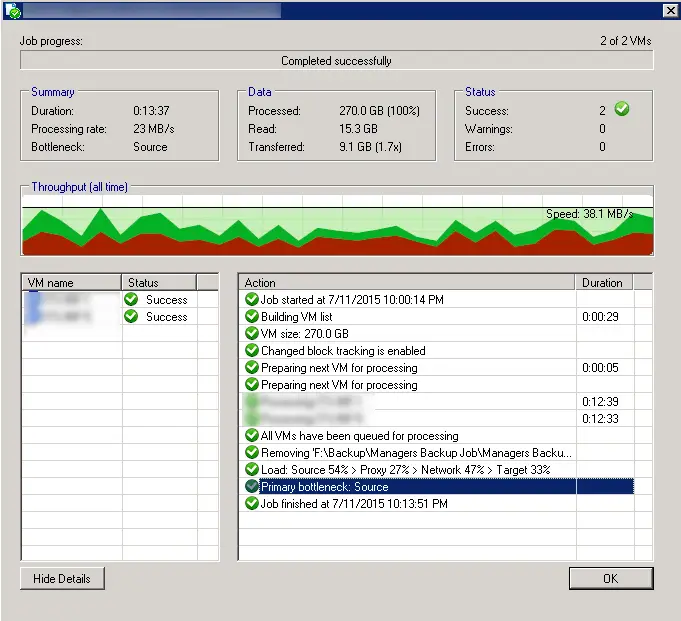
Veeam BR informing you about backup job and backup infrastructure performance when job is finished and you will see a window same as the below: Load: Source 54% > Proxy 27% > Network 47% > Target 33% Primary bottleneck: Source What does it mean? No matter what job you are running, and how you have the product deployed, there are 4 main data processing stages that data passes in the specific order (think data processing conveyor). These are Source > Proxy > Network > Target, and each processing stage has a load monitoring counter associated with it. “Source” is the source (production) storage disk reader component. The percent busy number for this component indicates percent of time that the source disk reader spent reading the data from the storage. For example, 99% busy means that the disk reader spent all of the time reading the data, because the following stages are always ready to accept more data for processing. This means that the source data retrieval speed is the bottleneck for the whole data processing conveyor. As opposed to that, 1% busy means that the source disk reader only spent 1% of time actually reading the data (and required data blocks...

HP Integrated Lights-Out 3 (iLO 3) – ESXi VM’s Showing 100% CPU Usage While Host CPU is Low 0

HP Integrated Lights-Out 3 (iLO 3) – ESXi VM’s Showing 100% CPU Usage While Host CPU is Low

If you have read HP or VMware documents about power management on ProLiant servers, both have suggested that configure power management to Static High Performance. I did it on all my ESXi servers and everything was good. But I have performance problem on some of G7 servers, I have checked all factors but I couldn’t find any reason about it. Then I found an article from HP about power management in ESXi and iLO3 (G7 servers). Seems, Static High Performance is root cause of performance issue on the servers with iLO3. This is related to power capping problem on iLO3. Based on the article suggestion, you should configure power management to OS control on the servers to preventing high CPU ready on virtual machines. You can see the instruction on the below link: https://h20566.www2.hp.com/hpsc/doc/public/display?sp4ts.oid=5178763&docId=mmr_kc-0105395&docLocale=en_US

Veeam BR – Backup Mode I/O Consideration 2

Veeam BR – Backup Mode I/O Consideration

If you want to use Veeam BR as you backup and recovery software in your virtual environment, you have to consider the below I/O table about your backup mode and choose best backup mode according to your backup infrastructure and your company backup policies: Backup Mode I/O Cost Incremental Backup 1x I/O on target (write for each changed block) Reversed Incremental Backup 3x I/O on target (write + read + write for each changed block) Active Full Backup 1x I/O on target (write for each block) Synthetic Full Backup For Incremental Backup Mode 2x I/O on target (read + write for each block) Synthetic Full Backup For Incremental Backup Mode With Transform 4x I/O on target (read + write + read + write for each block) Reversed Incremental will reduce your storage cost but increase I/O cost.  

Veeam Backup & Replication – Tape Backup Compatibility 0

Veeam Backup & Replication – Tape Backup Compatibility

There is some consideration about Veeam Backup & Replication and native tape support and most important thing is: Veeam Backup & Repliction doesn’t support tape via ESXi Passthrough.  So if you want to deploy a backup solution with tape and backup your repositories on tape drives, you have to use a physical server as tape server. Plug your tape device via FC or SCSI or any other supported connection types to tape server. You can assign tape server role to any server or also assign to Veeam Backup & Replication server too. Hope this post help you to prevent facing with some strange issues and confusion. Read this KB: 1016407 for more information.

Loading RDS Applications on Tera2 Zero Client 0

Loading RDS Applications on Tera2 Zero Client

Firmware 4.8 is released by Teradici for Tera2 Zero clients and new firmware has new feature for RDS applications. Users be able to load RDS applications on zero client and there is no need to load any OS. This feature very useful for using the devices in some public locations such as libraries, for example you can install your book finder application on a RDS server and add it to your connection server, then your subscribers can access to this app without loading that via any OS. You can download the firmware via Teradici support site. But as I mentioned before, this firmware is released for Tera2 generation.

VMware View Agent Disabled 0

VMware View Agent Disabled

When you have cloned a virtual machine from another and customization is failed or machine ID is not changed during customization, both virtual machines trying to communicate with connection server and you face with “Agent Disabled” status on View manager portal because View server ignores conflict messages. You need to remove the below key from the registry after removing View Agent: HKEY_LOCAL_MACHINE\SOFTWARE\VMware, Inc.\VMware VDM\ Then reinstall View Agent on the machine. [quotes_and_tips]  

Final 1

Add existing virtual desktops to “Automated Pool” in VMware View manually

VMware View offers two basic pools for create and manage virtual desktops, “Automated Pool” and “Manual Pool”. Each of them has own benefits. “Automated Pool” has better management features and “Manual Pool” has more flexibility. You can create virtual machines within a “Automated Pool” and the virtual machines will be created based on a pattern or manual name from a template. In other hand, you able to add virtual desktops that created from different templates, with different name pattern and from different vCenter folders to a “Manual Pool”.Some times, you have to remove some virtual machines from a pool or you have to add an existing virtual machines to a “Automated Pool”, but you can’t replace deleted virtual machines with new virtual machines with same name on a “Automated Pool” with specific naming pattern and you can’t add any existing virtual machines from vCenter to that. There is a solution that you can convert your “Automated Pool” to a “Manual Pool” temporary and add your virtual machines to that. Then you can convert that to “Automated Pool” again. In this case, I’ve created an automated pool with pattern naming (Test) and one VM is created in the pool (VM-1) ....