Add existing virtual desktops to “Automated Pool” in VMware View manually
VMware View offers two basic pools for create and manage virtual desktops, “Automated Pool” and “Manual Pool”. Each of them has own benefits. “Automated Pool” has better management features and “Manual Pool” has more flexibility.
You can create virtual machines within a “Automated Pool” and the virtual machines will be created based on a pattern or manual name from a template. In other hand, you able to add virtual desktops that created from different templates, with different name pattern and from different vCenter folders to a “Manual Pool”.
Some times, you have to remove some virtual machines from a pool or you have to add an existing virtual machines to a “Automated Pool”, but you can’t replace deleted virtual machines with new virtual machines with same name on a “Automated Pool” with specific naming pattern and you can’t add any existing virtual machines from vCenter to that.
There is a solution that you can convert your “Automated Pool” to a “Manual Pool” temporary and add your virtual machines to that. Then you can convert that to “Automated Pool” again.
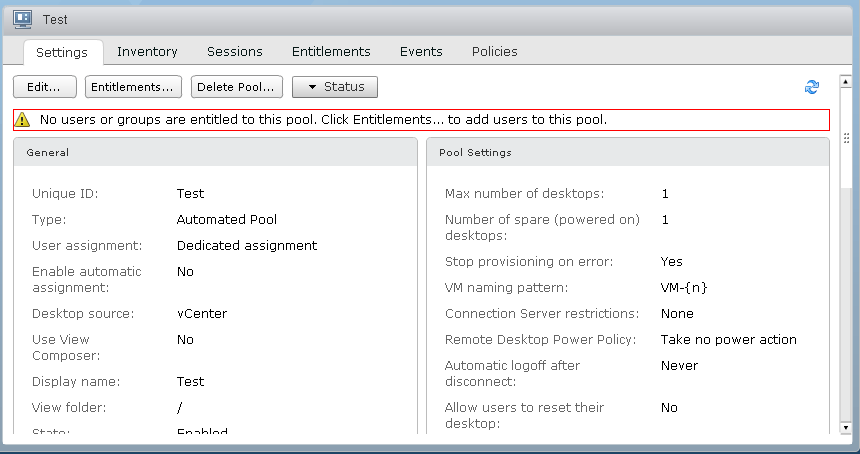
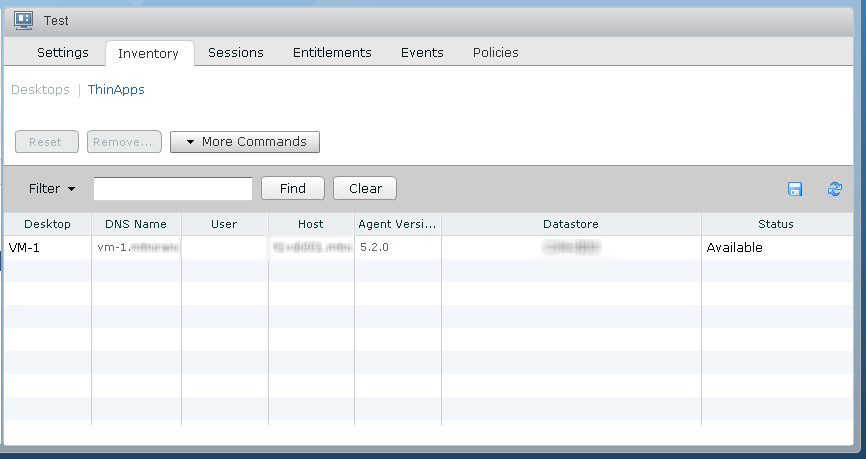
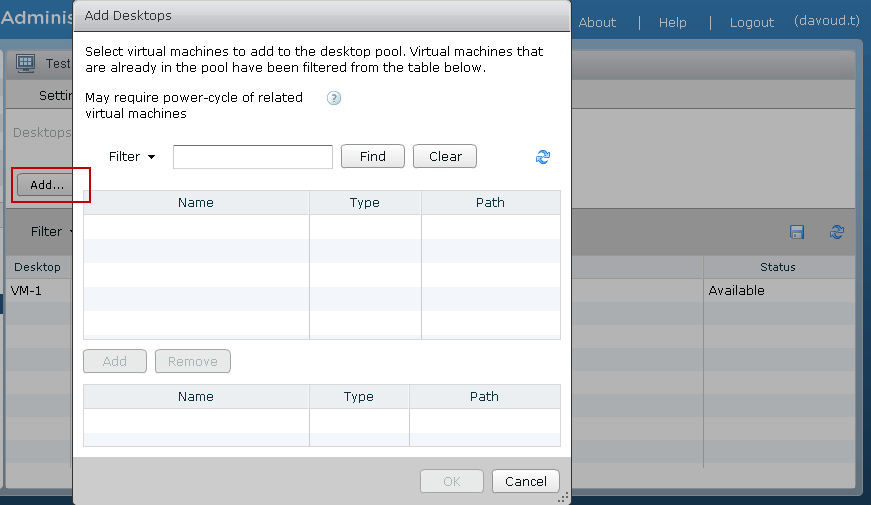
In this case, I’ve created an automated pool with pattern naming (Test) and one VM is created in the pool (VM-1) . You can see that on the below figure:
For convert your pool, you need access to VMware View ADAM database and change some things on that.
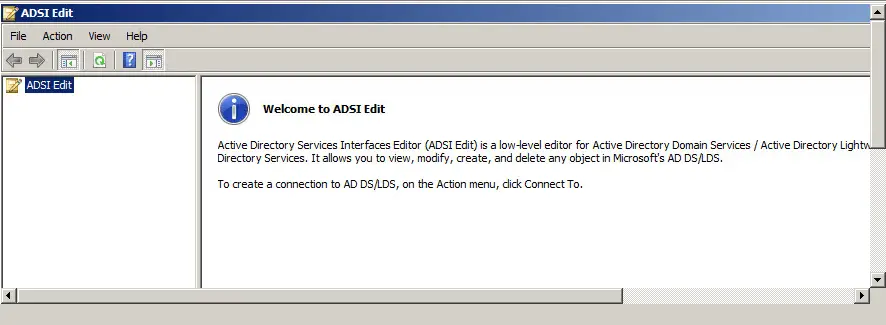
So logon to your View Connection Server and then connect to ADAM database by ADSI Edit tool.
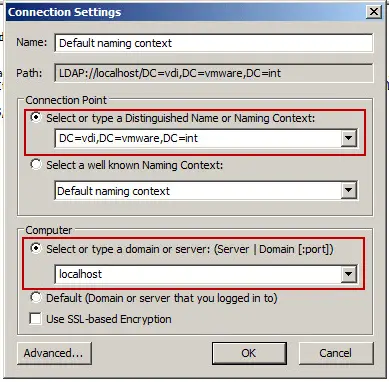
- Connection Point: Change to “Select or type a Distinguished Name or Naming Context” and then enter dc=vdi,dc=vmware,dc=int
- Computer: Change to “Select or type a domain or server:” and put in localhost
- Note: This assumes you are locally connected to the Connection Server
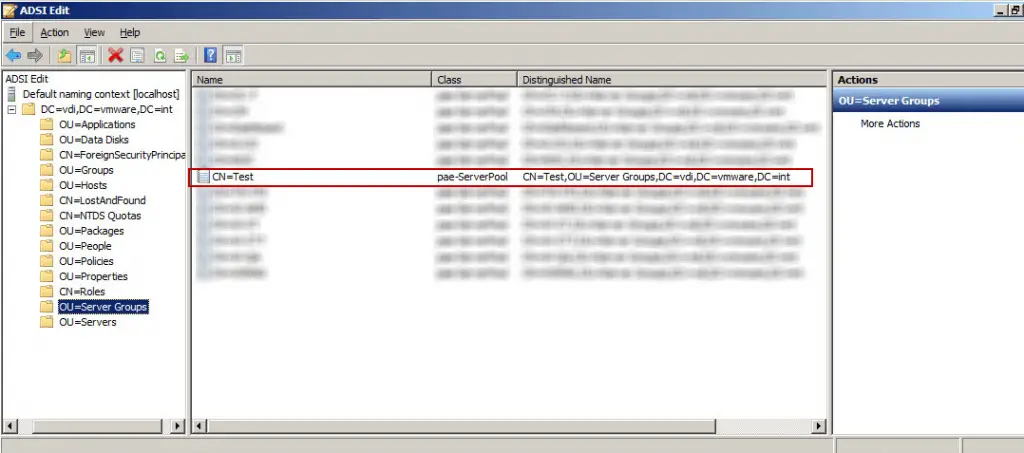
After connecting to the database, you can find your pools under “Server Groups” OU.
Before editing anything, please consider to VMware View pool types and attribute values:
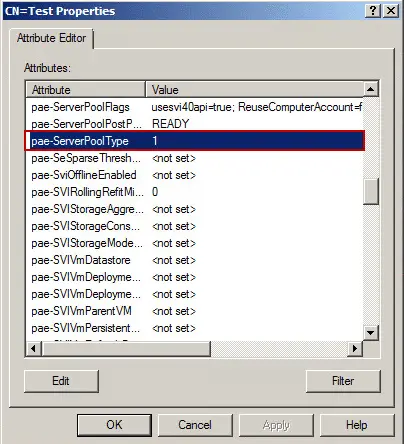
- Automated Pool with naming pattern – Attribute value=1
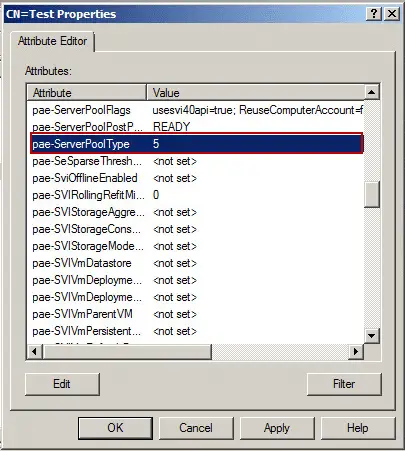
- Manual Pool – Attribute value=5
- Automated Pool with manual naming – Attribute value=12
Double click or right click on your pool to open that and edit its properties. Then you should edit a attribute (pae-ServerPoolType).
Now, you see a window same as the below figure:
Find the attribute and change the attribute value to “5” for changing pool type to manual pool.
Click on “OK” to apply the change.
Now, logon to your View Administrator portal or refresh your pools list, you’ll see that the pool is converted to a manual pool.
Then, open your pool and you’ll see “Add” button is visible now. Click on the button and then add your existing virtual machines to the pool.
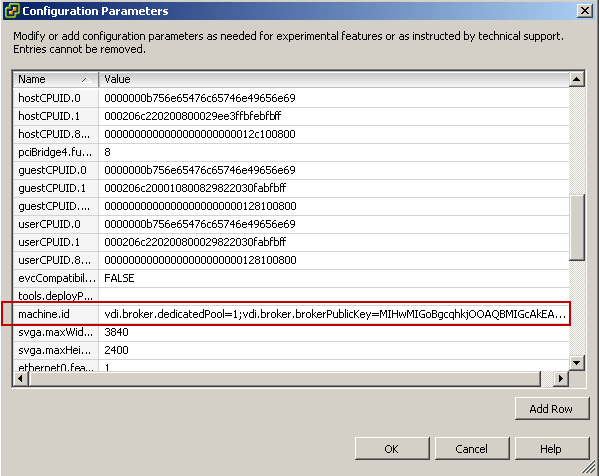
After adding virtual desktops to the pool, a attribute on the virtual desktops VMX file (machine.id) will be reconfigured by VMware View server. “machine.id” is contains of information about connection server, pool, broker public key and etc. You don’t change anything on that. It will be changed during reconfiguring process.
I added an existing virtual machine (Test-3) to the pool, the virtual machine is reconfigured by VMware View server.
Back to your pool view and refresh your virtual machines status, then you’ll see the virtual machines are ready to use.
Now, you have to edit the pool attribute and return value to 1 or 12 for reconvert that to a automated pool.
Notes:
- Don’t add virtual machine that it’s managing by another View manager.
- Some times you have to power off the added virtual machines. View will power on and reconfigure them automatically.
- Don’t change other settings on the converted pool.
- The solution is tested on View 5.2 and vCenter 5.1.
- Create manual backup from ADAM database before any change.
- Don’t add Windows XP virtual machine to a pool with 3D enabled feature.
- Sometimes you need to change some configuration on connection server and virtual desktop registry. (KB: 2038679)
- If you moved a virtual machine from manual pool to the pool. You should check “CustomizationInProgress” value in registry based on this KB: 1024421.
